Kitchen design and planning often goes wrong in the earliest stages. Usually people get carried away with the sexy designer aspects of the project and overlook the need for accurate measurement. They think they have measured the kitchen properly but they did not do it systematically and overlook a niche, alcove or some pipe work. The first time this oversight reveals itself is when the new kitchen is delivered and the fitting is underway. In other words at exactly the most inconvenient,and potentially expensive, moment. Below are some basic steps to follow to ensure this won't happen to you should you be thinking about renewing your kitchen
1
Make a sketch of your room on a large sheet of paper, this doesn't have to be a work of art, and it doesn't need to be to scale, all you need to show is the shape of the room. Stand in the centre of your kitchen and imagine it as an empty box. Don't draw in existing cabinets or appliances but do include any alcoves. Is your room an 'L' shape, a square, or a simple rectangle? Something else?
2
Now take measurements of the room, in imperial or metric, and transfer them to your sketch. It's best to use a steel tape measure, and make sure you measure into every corner. If you can, get a friend or partner to help you with this step. Don't forget, walls aren't always perfect squares - measure them at the top, middle and bottom.
3
Now measure your windows, doors and serving hatches, including any frames. You might want to do this on a separate piece of paper. Don't forget to include the frames in your measurements. You want your kitchen cabinets to sit alongside the
frames, rather than cover them!
4
Now measure the height your ceiling in several places to ensure it's level and add these figures to your notes. Does your ceiling have any special features? Measure all the dimensions of any slopes or bits that 'jut out'. If in doubt measure it!
5
If you are thinking of keeping any of your old kitchen appliances or other items, don't forget to measure all three dimensions, height, width and depth. Note these separately.
6
Note on the sketch the approximate location of any sockets: cooker, phone, electric, TV, and so on. Also note where
the light switches are.
7
Next make a note of any boilers, gas and electricity meters on your sketch, and then show measurements to include height, width, depth and location. Don't overlook pipe work running from boilers to other parts of the kitchen.
8
If there are radiators in the room measure their height and width. Don't forget to measure how far the stand proud of the wall. Mark them on your sketch.
9
Is your water mains stop cock in the room? If so, show its position on the sketch. Also take into account any other supply taps, such as gas.
Lastly re-check your measurements. It's laborious and tedious but could save you significant time and money in the long run.
Kitchen design, supply and installation Kent, Essex and South East England by Kitchen Solutions Kent
Wednesday 20 January 2010
Friday 1 January 2010
Kitchen splashbacks in glass.
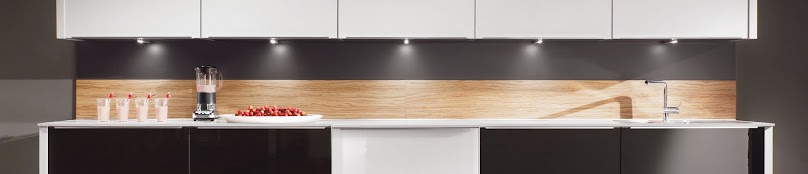
Preparing a sleek clean kitchen environment with the provision of colour, interest and enhanced light is a challenging task. However, the task of decorating the kitchen becomes easier when the latest trend in kitchen decor, that is glass splashbacks are used. We all have a rough idea about the beauty of stainless steel and enamel splashbacks, which offer a practical if rather dark solution. But with glass, the level of impact and interest can be outstanding.
There are various colour options available from a beautifully clean and sharp zest green, to the deep and the seductive tone of fuschia pink, subtle calming sea blue to the elegant statement made by shimmering gold or silver; and many colours in between. In fact at Kitchen Solutions Kent we can get your splashback manufactured in any colour you specify.
Glass splashback panels are available in a variety of sizes to suit standard cooker widths and sit neatly behind the hob. They are siliconed to the wall, making them extremely easy to fit. Moreover, they are formed in very strong glass, which also makes them incredibly difficult to break!
You can fit glass splashbacks on the entire wall space of your kitchen, around electrical sockets and light switches to give a completely sealed, stunning looking finish to your kitchen. This is achieved by making a template ,once your new kitchen has been installed, and then having the splashback manufactured at the factory. Once this has been done fitting is simple and takes only a couple of hours.
Visit our site for more details. Kitchen Solutions Kent a German kitchen specialist.
Subscribe to:
Posts (Atom)